Not Ready for the DIY Network
Mark and I learned the hard way that you have to pay BIG BUCKS for a decent mudding/taping job. Anyone who knows me knows what a tightwad I am. Hence, the thick texturing we had to do in our new addition.
So for the past 15 months, I've been putting off painting the twins' room. When a friend generously gave us her old bedding and paint, I took that as a sign that I should probably get going on that white room. I bought a few more quarts of paint and set to work last week on one of their birthday presents.
Here you can see the result of about 2 hours of measuring, math, and taping. The first stripe went up.

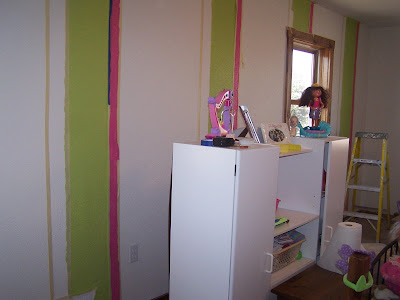
More taping (by the way, blue tape really doesn't stick on bumpy walls) and Color #2.

To preface my shoddy paint job, I just want to show you how "textured" the walls are.

Color #3. Jesus & Dora are happy to finally get some color in here!!

I tried cutting a large daisy petal out of a sponge and using lagoon breeze (orange), but it looked like Patrick Star. So I painted over that and went with little white free-handed flowers, inspired by a gift bag design.

It was supposed to be done when the girls came home from school, but not quite. Several hours later, the "reveal" was ready for Paige and Shae. They loved it! (You can see my little painter's helper proudly standing next to her big sisters.)

For future reference (if anybody cares), I used a 6-year-old can of "desert green" from the local True Value Hardware (thank you Kathy for the paint, bedding, and push I needed to get this job started!), "palm green", "azalea", and Ally's room "lagoon breeze" from Walmart, and white from Menards. Mind you, this is only one wall. I went with the "3's" approach ala Slacker Mom...3 walls left white, 1 wall painted. (The opposite wall will have the girls' names painted in these colors, at the head of their beds.) It turned out pretty cute; at least the girls were thrilled. As my husband would say, it was a job, well...done. :)
So for the past 15 months, I've been putting off painting the twins' room. When a friend generously gave us her old bedding and paint, I took that as a sign that I should probably get going on that white room. I bought a few more quarts of paint and set to work last week on one of their birthday presents.
Here you can see the result of about 2 hours of measuring, math, and taping. The first stripe went up.

More taping (by the way, blue tape really doesn't stick on bumpy walls) and Color #2.

To preface my shoddy paint job, I just want to show you how "textured" the walls are.

Color #3. Jesus & Dora are happy to finally get some color in here!!

I tried cutting a large daisy petal out of a sponge and using lagoon breeze (orange), but it looked like Patrick Star. So I painted over that and went with little white free-handed flowers, inspired by a gift bag design.

It was supposed to be done when the girls came home from school, but not quite. Several hours later, the "reveal" was ready for Paige and Shae. They loved it! (You can see my little painter's helper proudly standing next to her big sisters.)

For future reference (if anybody cares), I used a 6-year-old can of "desert green" from the local True Value Hardware (thank you Kathy for the paint, bedding, and push I needed to get this job started!), "palm green", "azalea", and Ally's room "lagoon breeze" from Walmart, and white from Menards. Mind you, this is only one wall. I went with the "3's" approach ala Slacker Mom...3 walls left white, 1 wall painted. (The opposite wall will have the girls' names painted in these colors, at the head of their beds.) It turned out pretty cute; at least the girls were thrilled. As my husband would say, it was a job, well...done. :)

1 Comments:
LOVE IT! That must have been a LOT of work!!!! Great job! I bet Paige and Shae love having fun stripes (plus those pretty flowers!) on their walls. I need a little push to get Ava's room done.
Post a Comment
Subscribe to Post Comments [Atom]
<< Home